Adding a payment method to Your Apple ID on iPhone or iPad is a simple process that enables you to make purchases on the App Store, subscribe to services like Apple Music, and pay for iCloud storage. In this guide, I’ll walk you through the steps, ensuring it’s as easy as possible for you to follow along.

Add a Payment Method to Apple ID on Your iPhone or iPad
If you primarily use an iPhone or iPad, follow these steps:
Step 1: Open the Settings App
The first thing you’ll need to do is open the Settings app on your iPhone or iPad. This is where all your device’s system preferences and account settings are located, including your Apple ID details.
Step 2: Tap on Your Name
Once you’re in the Settings app, you’ll notice that your name is at the top of the screen. Tap on it to access your Apple ID settings.
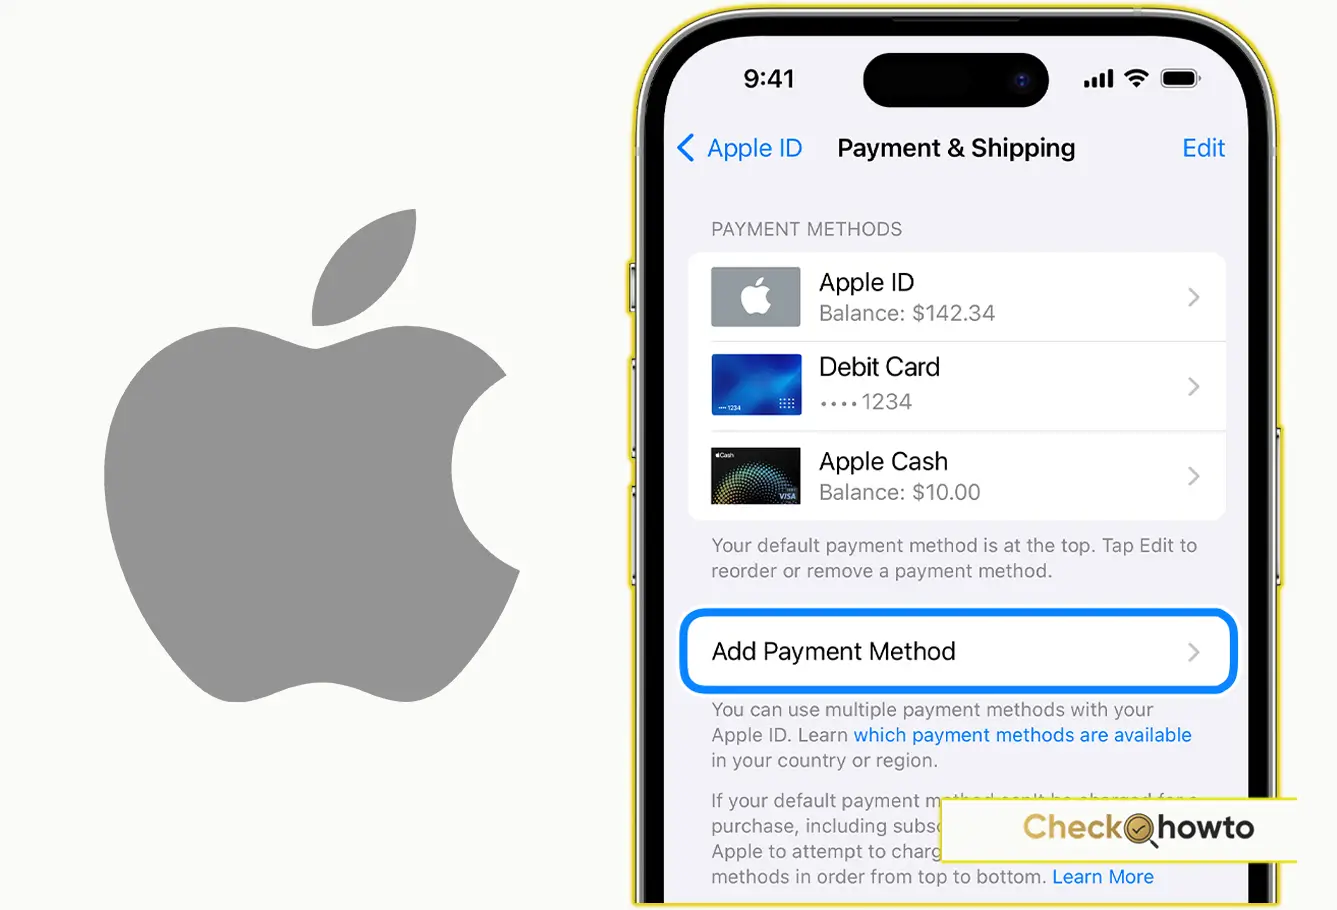
Step 3: Go to Payment & Shipping
Next, select the Payment & Shipping option. You might be asked to sign in with your Apple ID at this point, so make sure you have your credentials ready.
Step 4: Add a Payment Method
After you’ve entered the Payment & Shipping section, look for the Add Payment Method button. Tap on it, and you’ll be prompted to enter your payment details.
Step 5: Enter Your Payment Details
This is the part where you’ll need to fill in your credit card information, billing address, and other necessary payment information. Double-check to make sure all your details are correct before moving forward.
Step 6: Tap Done
Once you’ve entered everything, tap Done. Congratulations! You’ve now successfully added a payment method to your Apple ID, and it can be used across your Apple devices and services.
If You Can’t Add a Payment Method
Sometimes, things don’t go as planned. You might find yourself unable to add a payment method due to a few common reasons:
- Region Restrictions: Make sure the payment method you’re trying to add is accepted in your country or region. Apple has different payment options available depending on where you live.
- Family Sharing Issues: If you’re part of a Family Sharing group and the family organizer has already added a payment method, you may not be able to add your own unless they turn off Purchase Sharing.
- Incorrect Details: Double-check that your name, billing address, and card information match what your bank has on file. A simple typo can cause errors.
- Verification Issues: Some banks require you to verify transactions through their app or via text message. If you’re unable to complete the verification, reach out to your bank for assistance.
Conclusion
Adding a payment method to your iPhone or iPad is essential for a seamless experience with Apple’s services. By following these simple steps, you’ll be able to make purchases, subscribe to services, and even share your payment method with family members if you choose. Always ensure that your payment details are up-to-date and secure.
Related Post;
- How To Recover Deleted Files On iPhone
- How to Unpair Apple Watch


