Capturing screenshots on a Mac is straightforward, with several methods tailored to different needs, from full-screen captures to selected portions. Let’s walk through the main ways to capture what’s on your Mac screen, providing you with clear instructions so you can follow along effortlessly.
Method 1. Using Keyboard Shortcuts for Screenshots
One of the fastest ways to capture screenshots on a Mac is with keyboard shortcuts. Here’s a breakdown of the main shortcuts:
a) Full-Screen Screenshot
- Press Command + Shift + 3. This captures your entire screen instantly, saving the image to your desktop.
b) Selected Portion Screenshot
- Press Command + Shift + 4. This lets you select an area. A crosshair will appear, which you can drag to outline the section of the screen you want.
c) Active Window Screenshot
- Press Command + Shift + 4, then hit Spacebar. You’ll see a camera icon. Just click on the specific window you’d like to capture.
Each of these commands has distinct uses depending on whether you want a full image, a part, or a single window.
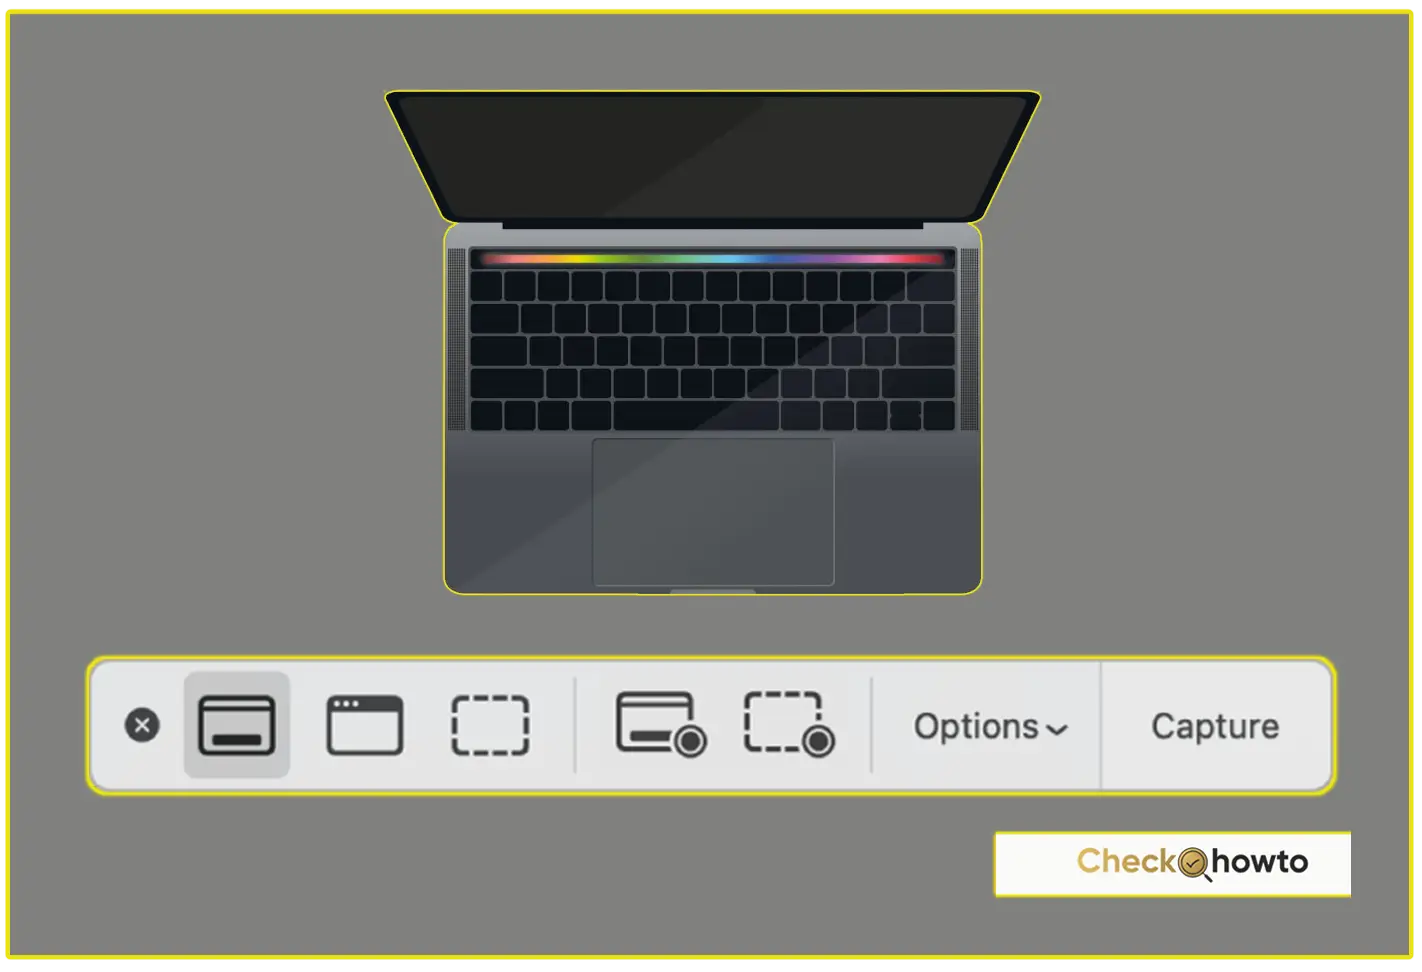
Method 2. Using the Screenshot Toolbar (macOS Mojave and Later)
For those on macOS Mojave or later, Apple introduced a dedicated Screenshot Toolbar:
- Press Command + Shift + 5. This opens up a toolbar at the bottom of your screen, offering options for taking a full-screen, windowed, or selected screenshot. You’ll also find options to record your screen.
This toolbar is intuitive, allowing you to adjust settings like saving location or setting a timer. It’s perfect if you prefer visual options over shortcuts.
See; Should I Get an SSD or HDD? Which is Right for You
How to Keep Your Laptop Closed and Use a Monitor
Method 3. Screenshot App for Advanced Options
Beyond keyboard shortcuts, there’s also a Screenshot app located in Applications > Utilities. Opening the app brings up the toolbar, similar to using Command + Shift + 5. However, using the app allows you to set more detailed preferences, like image format and location.
Saving and Managing Your Screenshots
By default, Mac saves screenshots to your desktop. However, you can change the location to keep your desktop tidy:
- Open the Screenshot Toolbar (Command + Shift + 5).
- Click on Options in the toolbar, where you can select another location, like a folder, Documents, or clipboard.
You can even opt to have screenshots deleted after a certain period, which is useful for managing storage.
Editing Your Screenshots with Preview
After taking a screenshot, a small thumbnail appears in the corner. Click on it to edit the screenshot directly, like cropping or adding annotations. You can also open any screenshot in Preview for more detailed editing.
Additional Tips for Efficient Screenshots
To work smarter, here are a few extra tips:
- Drag to Move Selected Portion: After pressing Command + Shift + 4, hold Space to move the selection.
- Specific Dimensions: After selecting, you can press Option to lock one dimension or Shift for aspect ratios.